Thursday 15 April 2021

Installing freeRadius with RadMan GUI with Apache Tomcat9 in Ubuntu 20.04


This guide is to help those users who want to use a very simple GUI with freeRadius. IT does support ldap authentication to GUI side not freeRadius. I have seen online that there literally ZERO documentation on it therefore, I have decide to make one. Keep in mind that RadMan is written in Java therefore, we would need to install Apache Tomcat.


RadMan is a FreeRadius Management GUI. It does not manage FreeRadius itself (it does not touch the FreeRadius config files). It offers is an easy way to manage a FreeRadius DB in a web interface. It aims to be simple to use, super fast to deploy and easy to maintain.

Update and Upgrade your Ubuntu

# apt update ; apt -y upgrade


Install wget and unzip which we will need it later

# apt install wget unzip 


Install freeRadius

# apt install freeradius freeradius-mysql


Install MariaDB

# apt install mariadb-server

# systemctl start mariadb

# systemctl enable mariadb


Configure Database

# mysql_secure_installation

Login to Mysql and create a database for freeRadius (Internal DB) and RadMan DB (External DB)

# mysql -u root -p

create database radius;

create database radman;

grant all on radius.* to radius@localhost identified by 'Test+123';

grant all on radius.* to radman@localhost identified by 'Test+123';

flush privileges;

Make sure that both DB has been created

show databses;

exit

By default, freeRADIUS uses flat-files to store data. Therefore, we have to configure it to use MariaDB database as its repository.

# mysql -u root -p radius < /etc/freeradius/3.0/mods-config/sql/main/mysql/schema.sql

Radman urges to have an extra table which is radhuntgroup which basically creates NAS Groups, this is necessary or else RadMan will fail.  

# mysql -u root -p radius

CREATE TABLE radhuntgroup (

    id int(11) unsigned NOT NULL auto_increment,

    groupname varchar(64) NOT NULL default '',

    nasipaddress varchar(15) NOT NULL default '',

    nasportid varchar(15) default NULL,

    PRIMARY KEY  (id),

    KEY nasipaddress (nasipaddress)

) ;

 We need to create a symbolic link of SQL in mods-available to mods-enabled. 

# ln -s /etc/freeradius/3.0/mods-available/sql /etc/freeradius/3.0/mods-enabled/

Search and edit SQL file according to what's shown below 

# vim /etc/freeradius/3.0/mods-enabled/sql
 

sql {

 driver = "rlm_sql_mysql"

 dialect = "mysql"

 # Connection info:

 server = "localhost"

 port = 3306

 login = "radius"

 password = "Test+123"

 # Database table configuration for everything except Oracle

 radius_db = "radius"

 }

# Set to "yes" to read radius clients from the database ("nas" table)

# Clients will ONLY be read on server startup.

read_clients = yes

# Table to keep radius client info

client_table = "nas"

Now comment out following lines shown below because we won't be using any TLS encryption at the moment. 

        mysql {

                # If any of the files below are set, TLS encryption is enabled

                #tls {

                #       ca_file = "/etc/ssl/certs/my_ca.crt"

                #       ca_path = "/etc/ssl/certs/"

                #       certificate_file = "/etc/ssl/certs/private/client.crt"

                #       private_key_file = "/etc/ssl/certs/private/client.key"

                #       cipher = "DHE-RSA-AES256-SHA:AES128-SHA"

                #

                #       tls_required = yes

                #       tls_check_cert = no

                #       tls_check_cert_cn = no

                #}

# chown root:freerad /etc/freeradius/3.0/mods-enabled/sql

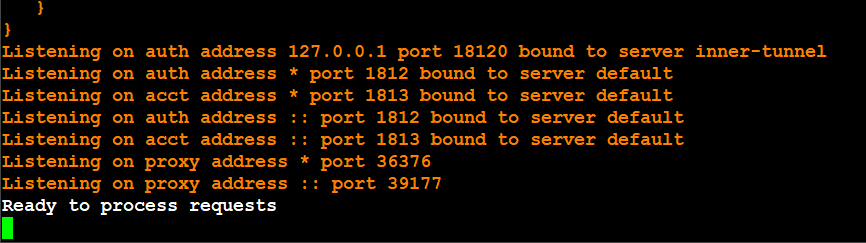
# systemctl restart freeradius.service


Install Tomcat Server

# apt install tomcat9 tomcat9-admin

# systemctl enable tomcat9

# systemctl start tomcat


Enabled Firewall

# ufw allow to any port 8089 proto tcp

# ufw allow to any port 3306 proto tcp

ufw allow to any port 1812 proto udp

# ufw allow to any port 1813 proto udp

# ufw status

Install Java

# apt install default-jre

Make sure Java is installed

# java -version


Download and Install Radman 

# wget https://github.com/netcore-jsa/radman/releases/download/Release-1.0.2/radman-1.0.2.zip

# mkdir /opt/radman

# mkdir /etc/radman

# unzip radman-1.0.2.zip

# mv RadMan.jar /opt/radman/RadMan.jar

# mv -i radman.properties.example /etc/radman/radman.properties

# mv -i radman.default /etc/default/radman

# mv -i radman.service /etc/systemd/system/radman.service 

# systemctl daemon-reload 


Edit radman.properties - edit internal and external database 

# vim /etc/radman/radman.properties 

We must keep in mind that RadMan has 2 database Internal and External. 

Internal DB meaning freeRadius DB whereas, External Radius meaning RadMan DB 

# systemctl status radman.service

# systemctl start radman.services

# systemctl enable radman


Check if port 8089 is running

# netstat -tnlp

you should see something like this

tcp6       0      0 :::8089                 :::*                    LISTEN      689/java


Open your browser and type in http://IP:8089
http://192.168.21.5:8089


Install Apache Tomcat9 in CentOS Stream, Oracle Linux 8


Create tomcat user and group

We need to add user dedicated to running tomcat service.

# groupadd --system tomcat

# useradd -d /usr/share/tomcat -r -s /bin/false -g tomcat tomcat

Install Tomcat 9 on Linux RHEL / CentOS 8

Check the latest release version of Tomcat 9. Save the version number to VER variable and proceed to download.

# dnf -y install wget

# export VER="9.0.XX"

# wget https://archive.apache.org/dist/tomcat/tomcat-9/v${VER}/bin/apache-tomcat-${VER}.tar.gz

Extract downloaded file with tar.

# tar xvf apache-tomcat-${VER}.tar.gz -C /usr/share/

# ln -s /usr/share/apache-tomcat-$VER/ /usr/share/tomcat

If you download a newer version of Tomcat, just update the symbolic link to the new version folder.

Set proper directory permissions.

# chown -R tomcat:tomcat /usr/share/tomcat

# chown -R tomcat:tomcat /usr/share/apache-tomcat-$VER/

Configure Tomcat 9 Systemd service

Create a new systemd service to Tomcat.

# vim /etc/systemd/system/tomcat.service

With below configuration:

[Unit]

Description=Tomcat Server

After=syslog.target network.target

[Service]

Type=forking

User=tomcat

Group=tomcat

Environment=JAVA_HOME=/usr/lib/jvm/jre

Environment='JAVA_OPTS=-Djava.awt.headless=true'

Environment=CATALINA_HOME=/usr/share/tomcat

Environment=CATALINA_BASE=/usr/share/tomcat

Environment=CATALINA_PID=/usr/share/tomcat/temp/tomcat.pid

Environment='CATALINA_OPTS=-Xms512M -Xmx1024M'

ExecStart=/usr/share/tomcat/bin/catalina.sh start

ExecStop=/usr/share/tomcat/bin/catalina.sh stop

[Install]

WantedBy=multi-user.target


Start and enable service.

# sudo systemctl daemon-reload

# sudo systemctl enable tomcat

# sudo systemctl start tomcat


Check service status with the following command:

# systemctl status tomcat


Configure Firewall

# sudo firewall-cmd --permanent --add-port=8080/tcp

# sudo firewall-cmd --reload

Access Tomcat Web interface

Open browser and type http://ip-or-hostname:8080


freeRadius Installation in Oracle Linux 8, RedHat 8 and CentOS Stream


 Installation of freeRadius in Oracle Linux 8

# dnf -y update

# dnf search freeradius

# dnf -y install freeradius


Config File location: 

/etc/raddb

Two most important files within /etc/raddb are: -

/etc/raddb/clients.conf

It is where details of client router, switch, pc etc will be here

Basic conf would be like this, make sure you take a backup

#  vim /etc/raddb/clients.conf

clients testpc {

    ipaddr = 192.168.1.1

    shortname = Windows10-PC

    secret   = blabla+123

}

clients router {

ipaddr = 10.10.1.1

shortname = CiscoRouter

secret   = Hmm+098

}

Make sure there is no space

/etc/raddb/users

It is where user info will be located, username pass etc

Basic conf would be like this, make sure you take a backup

○ # vim /etc/raddb/users

bob   Cleartext-Password := "hello"

Enable firewall for port 1812 and 1813
# systemctl status firewalld
# systemctl start firewalld
# firewall-cmd --permanent --zone=public --add-port=1812/udp
# firewall-cmd --permanent --zone=public --add-port=1813/udp
# firewall-cmd --reload
# firewall --list-all

Check if ports are up and running

# netstat -unlp 

To check logs

# vim /etc/raddb/radius.conf


To do a testing you can download a tool called ntradping or you can use radtest command. 

I won't go through how to use ntradping but I will walk you through radtest command

Make sure you open 2 SSH session with on freeradius server

Stop the freeradius service

# systemctl stop radiusd

Go to debugging mode

# radiusd -X


Now, on another SSH session start your radtest
# radtest bob hello localhost 0 testing123


 If you go back to your other SSH session which is in debuggig mode you should see a something like this